- obbyb
Lets build
To get a good understanding of the Studio and Easyweb it would be best to try to do something with it, So lets get started and build something!
As a starting-point lets use the below section as a reference to what we want to build.

What we see is a simple "Hero"-section, meant to be the first impression when visiting this site.
Since Easyweb is a Content Management System we want to view it from the standpoint of what content of it do we want provided from Easyweb?
In this case it would be the image (used as background) and 2 text-inputs (the label and header).
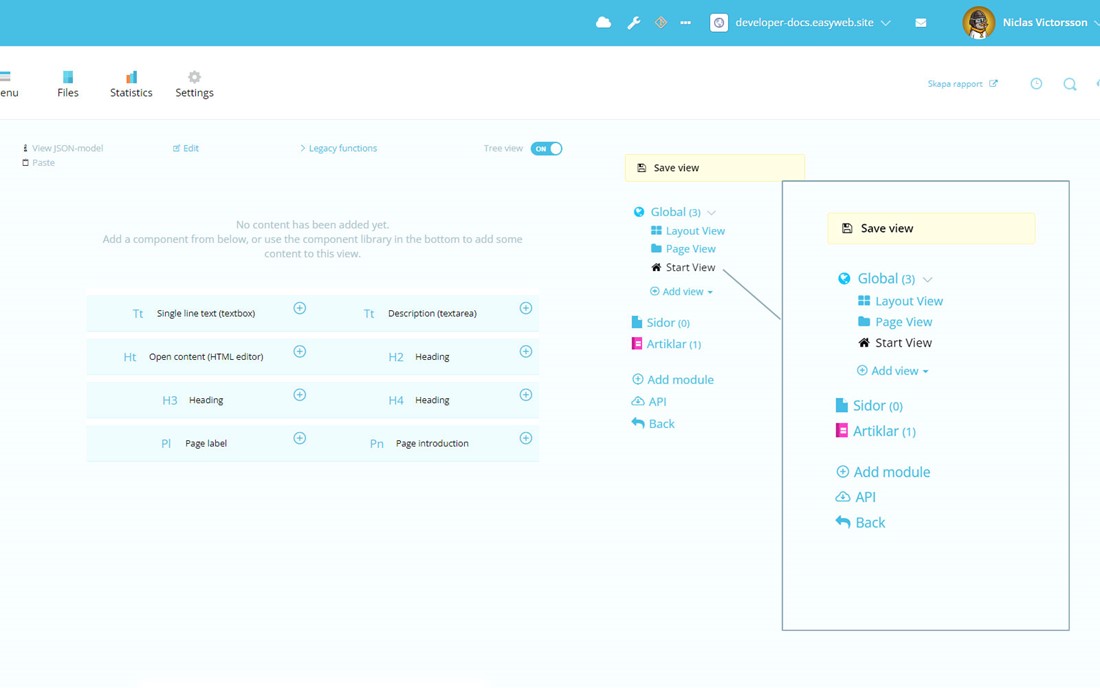
In the Studio, start with opening the view/template that we want to edit, in this case the "Start View" under "Global". (shown in the image above)
As we can see no content has been added yet, so lets try add some content according to what we identified that we need.
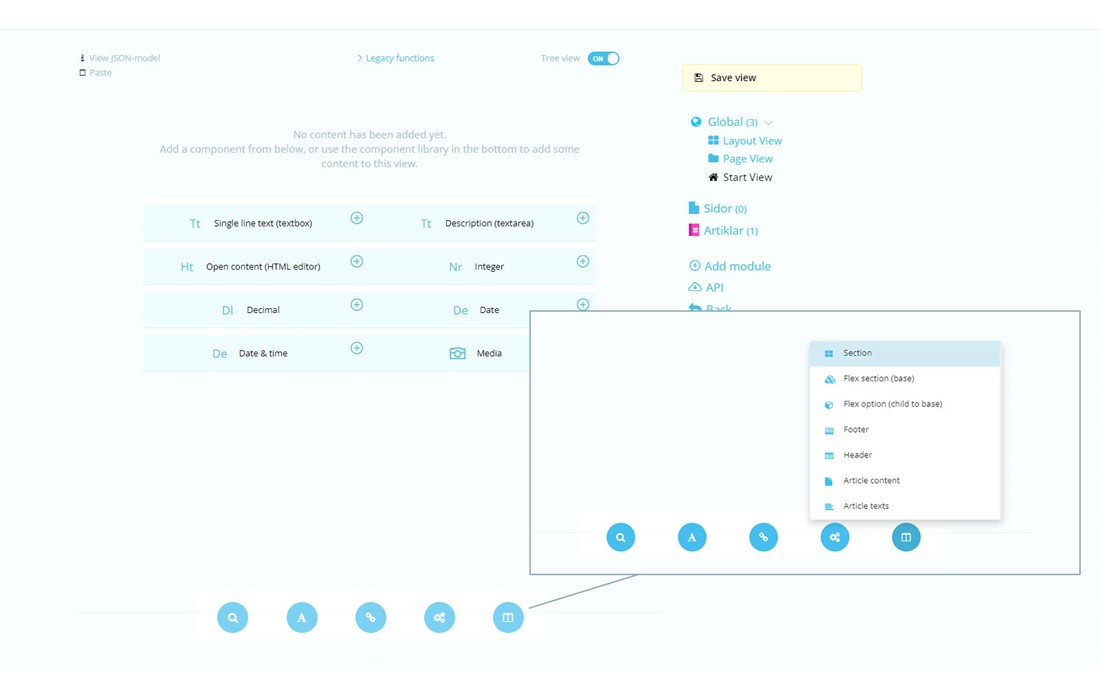
At the bottom of the Studio we have groups of all available element-inputs.

All elements and element-groups (Text, Reference, Feature and Sections)
We can start with creating a "Section" as a way to just group our new content. (Section elements are found in the "SectionType"-elements group)
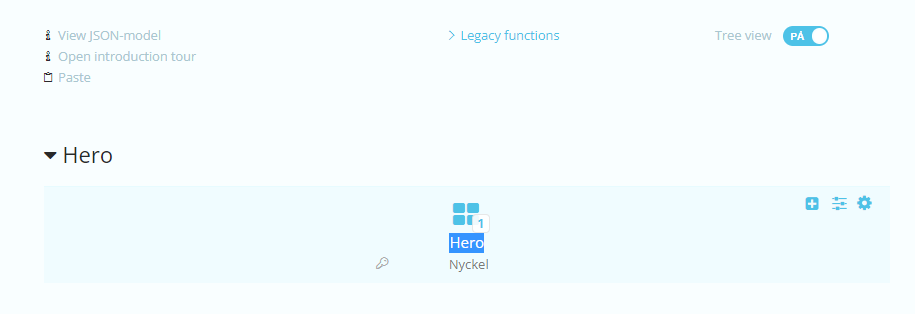
With our new section created, we can start with giving it a name. Since this is our startpages hero-section we might as well just call it "Hero"
The name we give an element in the studio is the name that the web-editor will see when editing the content of the element on the page.
To our "Hero", lets add the elements that we need.
To the right of the section in the studio, we see the "add-icon", click on it and select "Image".
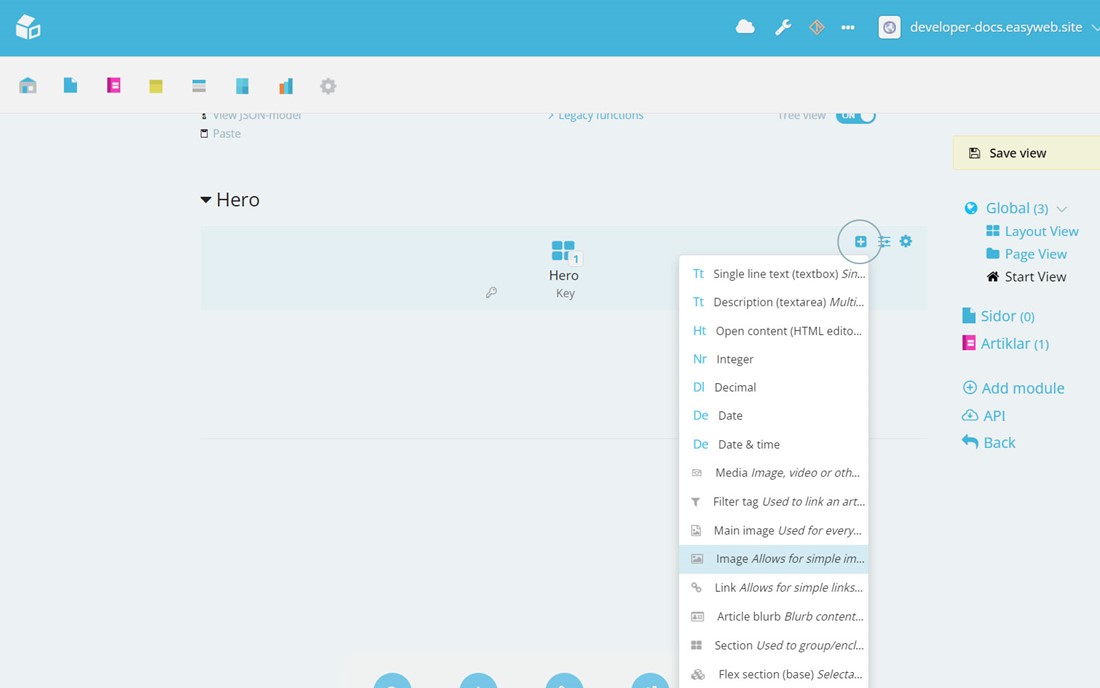
Do the same for the 2 text-inputs that we need, since its shorter texts that we're after, i would suggest "Single line text (textbox)".
More about "Text"-elements (TextBox, TextArea, HtmlEdit)
When you added the elements to the section we should see something like this:
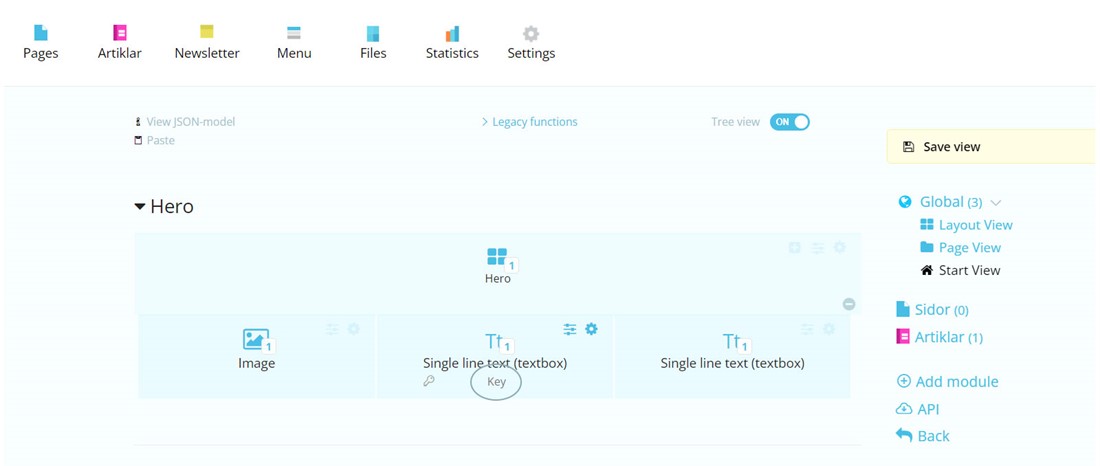
Since we have 2 elements of the same sort, it can be worth noting the keyword "Key".
The "Key" is the identifier/name as it will be provided as JSON-data via the API later.
If no "Key" is added, it will default to the element-name, in this case "textbox", and "Image" for the image-element.
Lets give the 2 textboxes each a name and unique "key".
Lets just name them "Label" and "Header".
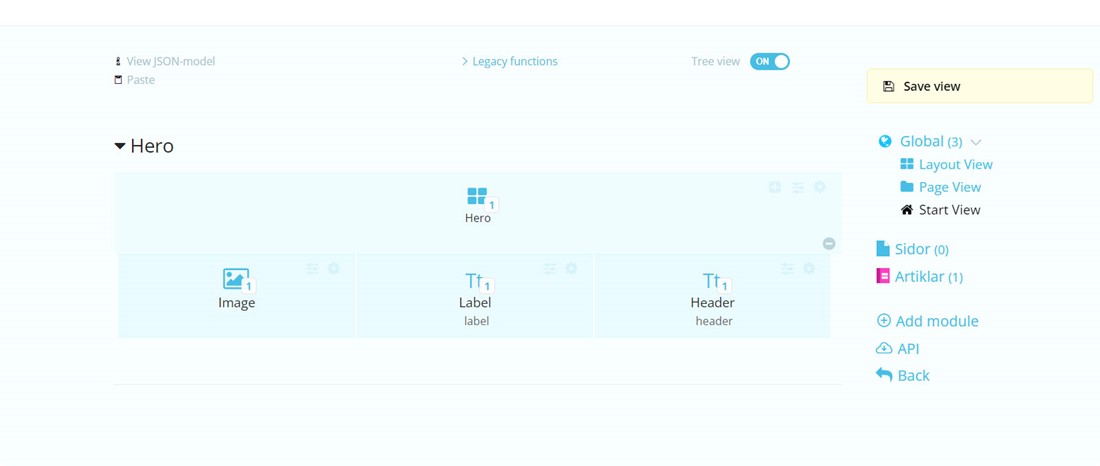
Now we've successfully built our first studio-component, a hero-section that consists of a image and two text-inputs, congratulations!
Now lets see what this did for the editor when editing the startpage.


