- obbyb
- Emil
Lets get the data
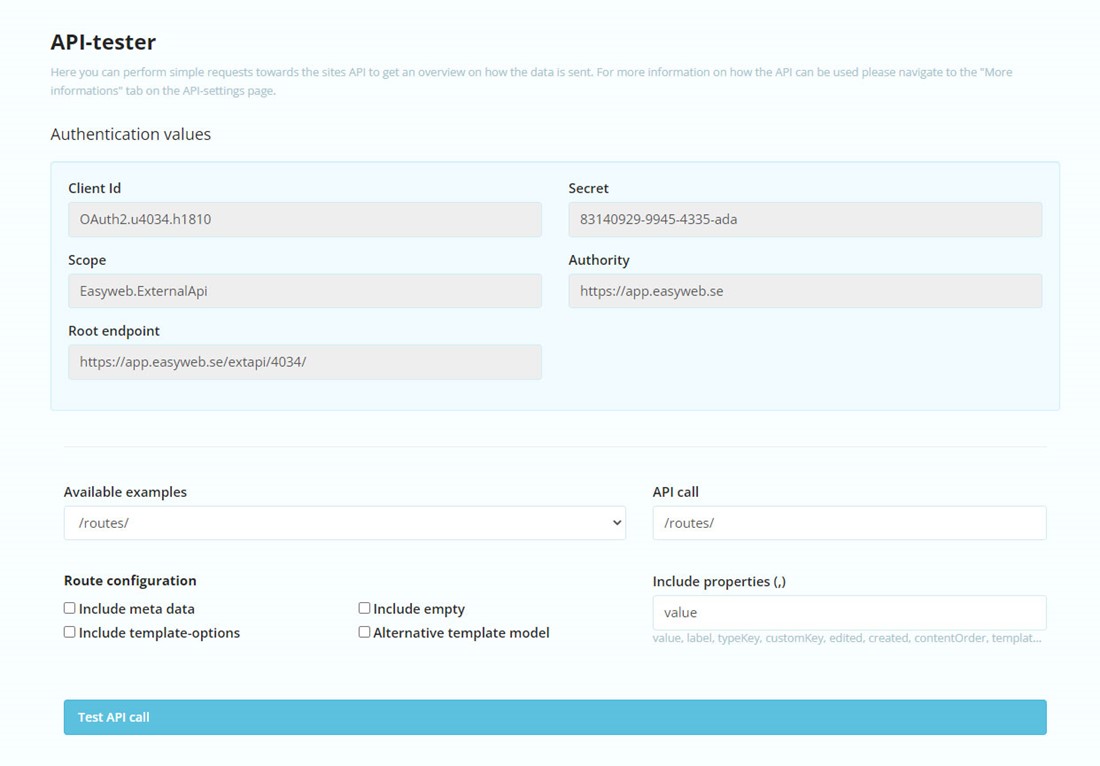
The API part is where you'll find our ”Control-panel” for API-calls for fetching your data.
In this part of the studio you will set up and view your credentials for authentication, you will also be able to try the different route-urls and view the json-data provided.
Easyweb is using ”0auth2” for authentication.
If you want to learn more about that you can read about it on the official website.

In the top area is where we see our available API-connection.
Here you can see our required credentials.
Regarding the credentials:
- Client-ID
- Secret
- Root endpoint
Below the credentials you have the possibility of testing various calls with various settings, just pick a route under "Available examples" and click the "Test API call"-button.

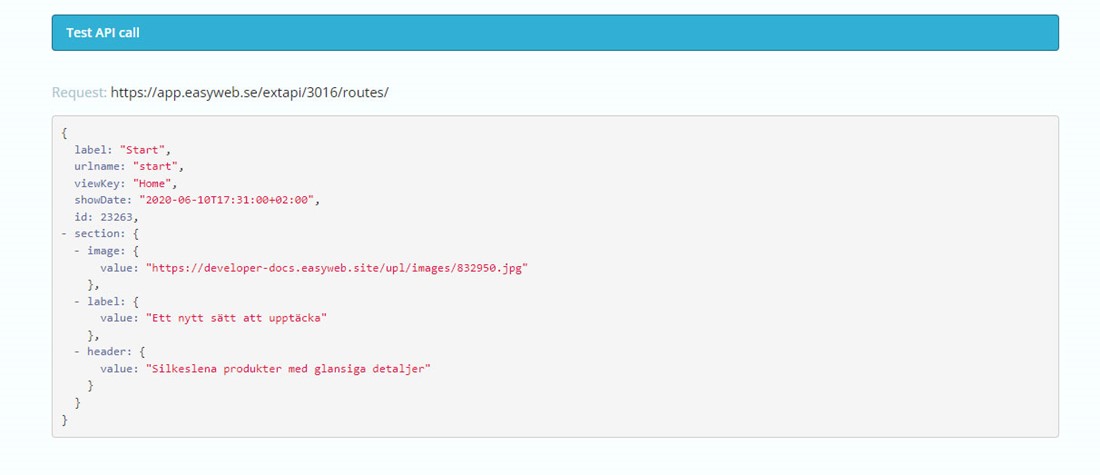
Above you can see the result with the content we provided to our hero component on our startpage.
Making calls to your project:
You need to run a web server (such as Node.js) to be able to fetch data from the API.
Client-ID and the Secret is whats needed for the authentication and URL is the root endpoint is needed for all calls.
Using the javascript fetch method, we can easily get our access token by using the /connect/token endpoint.
You can copy this code and use the getData()-method in your project to fetch your content:
const CLIENT_ID = 'xxxxxx.xxxxx.xxxxx'
const CLIENT_SECRET = 'xxxxxxxx-xxxx-xxxx-xxx'
const API_URL = 'https://app.easyweb.se/extapi/XXXX'

const token = async () => {
  const AUTH = 'Basic ' + btoa(CLIENT_ID + ':' + CLIENT_SECRET)
  const RAW_URL = API_URL.split('/extapi/')[0]

  const res = await fetch(RAW_URL + '/connect/token', {
    method: 'POST',
    headers: {
      Authorization: AUTH,
      Accept: 'application/json',
      'Content-Type': 'application/x-www-form-urlencoded',
    },
    body:
      'client_id=' +
      CLIENT_ID +
      '&client_secret=' +
      CLIENT_SECRET +
      '&grant_type=client_credentials&scope=Easyweb.ExternalApi',
  })

  const tokenObject = await res.json()
  return tokenObject.access_token
}

export const getData = async (endPoint) => {
  const accessToken = await token()
  const url = API_URL + endPoint

  const res = await fetch(url, {
    headers: { Authorization: 'Bearer ' + accessToken },
  })

  const data = await res.json()
  return data
}
With the provided code, we can get access to our content. To get the content on the startpage, we'll use the /routes/home endpoint. This is an example of how we can use the getData()-method in a React.js component:
import React, { useState, useEffect } from 'react'
import { getData } from '../services/EasywebApiService'

const MyComponent = () => {
  const [data, setData] = useState(null)

  useEffect(() => {
    var renderData = async () => {
      const apiData = await getData('/routes/home')
      setData(JSON.stringify(apiData))
    }

    renderData()
  }, [])

  return (
    <div>
      <h1>Easyweb API Data:</h1>
      {data ? <p>{data}</p> : <p>Loading...</p>}
    </div>
  )
}

export default MyComponent
The request response includes all the elements with keys added from the studio. And each element has the "value" property that contains our content:
{
   label: "Start",
   urlname: "start",
   viewKey: "Home",
   showDate: "2020-06-10T17:31:00+02:00",
   id: 23263,
   hero: {
       image: {
           value: "https://developer-docs.easyweb.site/upl/images/832950_1100_0_1_thumb.jpg"
       },
       label: {
           value: "Ett nytt sätt att upptäcka"
       },
       header: {
           value: "Silkeslena produkter med glansiga detaljer"
       },
    },
}
That's everything you need to build your interface!


